
Tile is the most browsed category on our site — more people look at tile than at hardwood, laminate and carpet combined. It is also the category where the finished result depends least on the tile you pick and most on what happens before it goes down.
This guide covers what tile costs to buy in Vancouver, what actually drives the installed price, and the decisions — substrate, format, pattern, niche, bench, grout — that people wish they had made on purpose. Figures checked September 2026.
What the tile itself costs
We carry about 3,870 tile products from Ames Tile, Richmond, Tierra Sol and Julian Tile. Supply prices fall roughly in these bands:
| Type | Typical supply price | Where it makes sense |
|---|---|---|
| Ceramic wall tile | $4 – $8 / sq ft | Bathroom walls, laundry, rental units |
| Porcelain floor tile | $5 – $10 / sq ft | Bathrooms, entryways, kitchens, heated floors |
| Large-format porcelain (24"+) | $7 – $15 / sq ft | Fewer grout lines, modern look, shower walls |
| Porcelain slab / stone look | $14 – $30 / sq ft | Feature walls, curbless showers, high-end |
| Mosaic, hex & glass | $12 – $35 / sq ft | Shower floors, niches, backsplash accents |
Order 10–15% extra. Cuts, breakage and future repairs all come out of that overage, and dye lots change — a tile you try to match in two years will not be the same tile. For a diagonal or herringbone layout, order 15–20%.
You can filter the full range by category, brand and colour in the tile catalogue, or see samples in person at our West Broadway showroom.
What actually happens on site, stage by stage
A tile job is not one task, it is fourteen. Most of them happen before a single tile is set, and most of what goes wrong later is decided in the first six.
| # | Stage | What happens |
|---|---|---|
| 1 | Site visit & measure | We measure the room, check the floor for flatness, look at the substrate and the plumbing, and confirm what is actually under the existing floor. |
| 2 | Protection | Floor paths, doorways and adjacent rooms are protected. In a condo, elevator pads and corridor protection are booked with the building. |
| 3 | Demolition & removal | Old tile, backer board or sheet flooring comes out. Thinset is ground back. Debris is bagged and removed — in a tower, that is a scheduled trip, not a wheelbarrow. |
| 4 | Substrate inspection | The first honest look at what you actually have. Rot, movement, a floor that is 3/4" out of level, or a joist that needs sistering all show up here. |
| 5 | Framing & blocking | Niche openings framed, bench built, blocking added for a grab bar, a floating bench or a glass panel. Anything you want in the wall has to be decided now. |
| 6 | Rough-in changes | If the drain moves, the valve changes height, or a niche light is added, the plumber and electrician work here — before anything closes up. |
| 7 | Levelling | Self-levelling compound or a mortar bed brings the floor into tolerance. Needs cure time before anything goes on top of it. |
| 8 | Backer board / uncoupling | Cement board or a foam board on walls; an uncoupling membrane on the floor so the slab and the tile can move independently. |
| 9 | Waterproofing | Membrane over the pan, up the walls, over the curb, into the niche, sealed at every corner and tied into the drain flange. Followed by a flood test where the system allows one. |
| 10 | Layout & dry-fit | Where the full tiles land, where the cuts fall, how the pattern meets the niche and the corners. Twenty minutes here is the difference between a job that looks planned and one that looks squeezed. |
| 11 | Setting the tile | Floor, walls, shower — each with its own trowel, mortar and cure time. Large-format tile is back-buttered; every tile in a wet area is fully supported, not spot-bonded. |
| 12 | Cuts & edge detail | Outside corners mitred or profiled, holes cut for valves and outlets, the tile field closed out at every edge. See the trim section below. |
| 13 | Grout, silicone & seal | Grout in the field, silicone at every change of plane, and sealer on cementitious grout once it has cured. |
| 14 | Clean & handover | Haze removed, silicone checked, and — on our jobs — photographs of the waterproofing handed over with the invoice. |

Why there is no price beside these stages
We do not publish a per-stage or per-square-foot installation rate, and you should be careful with anyone who does. The same $6 tile can be a straightforward two days or a difficult two weeks, and the difference is never in the tile:
- What is under the floor. A flat slab and a 3/4" dip are the same photograph and a very different quote.
- Tile format. Mosaic is slow because there are hundreds of pieces. A 24"x48" is slow because it is heavy, unforgiving and needs two people.
- Pattern. Straight-set is the baseline; herringbone, 1/3 offset and 45° diagonal add cuts, waste and layout time.
- The shower itself. A curbless entry, a linear drain, a lit niche and a built-in bench are four separate builds inside one shower.
- Access. A ground-floor house and a 24th-floor condo with two delivery mornings a week are not the same job.
So the honest answer is the same one we would give a friend: book the free estimate and let someone look at it. The site visit costs nothing, there is no obligation, and you leave with a written number that accounts for all fourteen stages instead of a guess that accounts for one.
The substrate decides everything
If you take one thing from this guide, take this: tile is only as good as what it is stuck to. Almost every tile failure we are called to fix — cracked grout lines, a loose tile that clicks underfoot, a shower that grew mould behind the wall — traces back to the layer nobody sees.
Flatness
Industry guidance is that any tile with an edge of 15 inches or more needs a substrate flat to about 1/8" over 10 feet. Very few Vancouver condo slabs are that flat out of the box. Getting there is a self-levelling step — a real line on the quote, not an optional extra. Skip it under a 24"x48" tile and you get lipped edges you can feel with a bare foot and, eventually, cracks.
Movement
Concrete moves, plywood moves, and tile does not. An uncoupling membrane lets the two move independently. On a concrete condo floor, and under any heated floor, it is the cheapest insurance you will buy in the whole project.
Waterproofing
Tile and grout are not waterproof. Grout is cement; it absorbs water. What keeps a shower dry is a bonded membrane behind and beneath the tile, carried up the walls, over the curb, into the niche and tied into the drain. A shower built without it will look identical on handover day and fail in three to five years.
This is the most common thing a cheap quote leaves out, because it is the one part nobody can see afterwards. We explain how these systems are built, layer by layer, in our Schluter waterproofing guide — worth reading before you compare quotes, so you know what you are comparing.
If you want to see what skipping it looks like three years later, read why bathroom mold keeps coming back.

Photograph the waterproofing before it is tiled over. It takes two minutes, some strata councils ask for it, and it settles arguments years later.
Floors: big tile or small tile
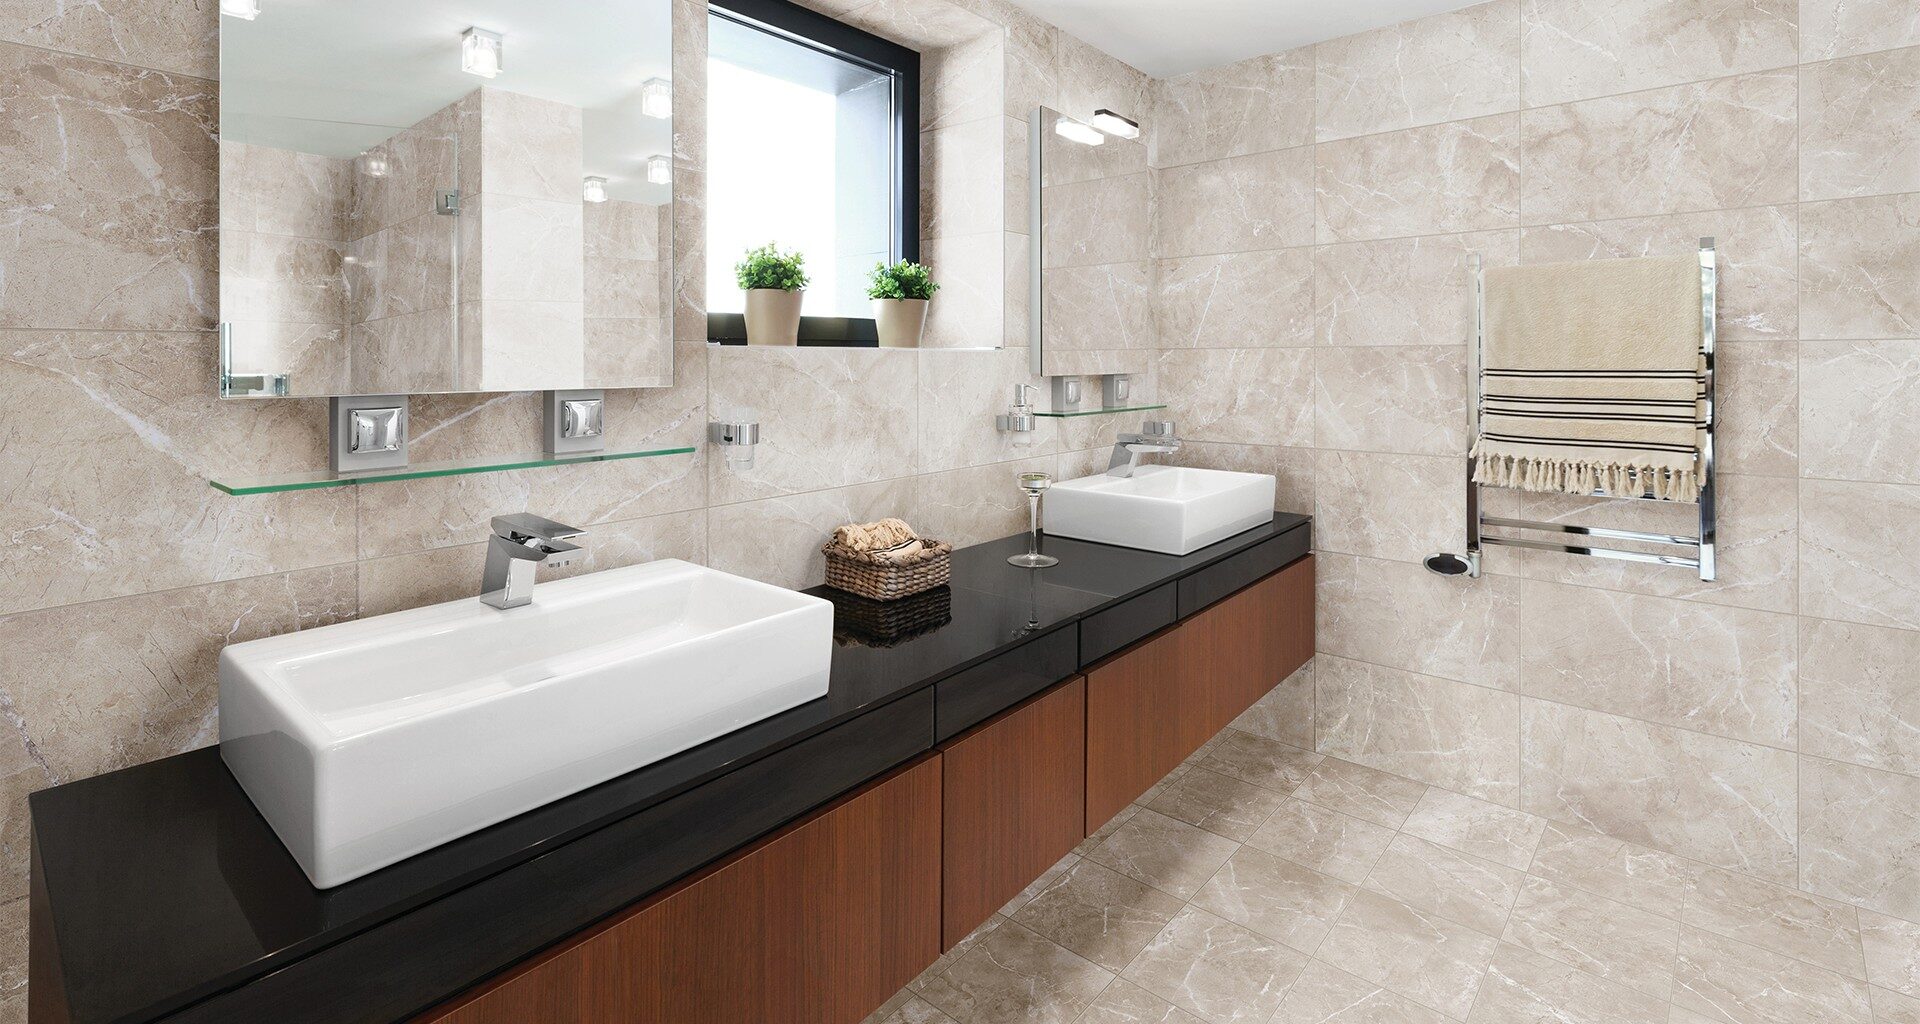
Looking at what our own visitors open most, the Vancouver floor is clear: 12"x24" matte porcelain is the workhorse. Six of our ten most-viewed tiles this quarter are in that format — Foundations Miura White, Capri Glacier, Crown White, Monza Cloud, Carbon, I-marmi Dante Blanco.
It is popular for good reasons: fewer grout lines than a 12x12, a matte finish that hides water spots, and a size a crew can lay accurately. Larger again — 24"x48", 16"x32", or a 36"x72" slab — looks calmer still, but every inch of extra length makes the flatness of the floor underneath more critical.
Where small tile is the right answer
On a shower floor, small is not a compromise — it is the correct choice. A shower floor has to slope to the drain from every direction, and a large tile cannot bend. Mosaic sheets and pebble sheets conform to that slope, and the extra grout lines give grip where the floor is wet and soapy.
That is not theory: the single most-viewed tile on our site this quarter is a 12x12 sliced pebble mesh sheet, and hex mosaic sheets are not far behind. People are finding them because their shower floor needs them.

For any wet floor, ask about slip resistance. The usual benchmark for level interior wet areas is a DCOF of 0.42 or higher — a polished large-format tile that looks beautiful in a showroom can be genuinely unsafe in a shower.
Showers: the details that decide the job
The niche
A recessed niche is the difference between a shelf full of bottles and a shower that looks finished. Everything about it has to be decided before the wall closes.
- Where. On the wall opposite the shower head so it stays out of the spray, and between studs — which means the framing is planned, not discovered.
- How big. One tall niche holds more than two small ones and reads as deliberate. A shelf across the middle splits it into shampoo below, razor above. Sizing the opening to land on full tiles, rather than cutting a slice off the next one, is what makes it look built rather than cut in.
- How it is finished. A mitred 45° edge wraps the tile around the opening with no visible trim; a metal profile is tougher and, in the right finish, deliberate. Both are covered below.
- Waterproofing. A niche is a hole in your shower wall. It has to be membraned on every face, sealed at every corner, and the bottom shelf sloped slightly forward so water runs out instead of sitting.

Lighting in the niche
Yes — a lit niche is very doable, and it is one of the upgrades people notice most. It has to be planned early, because it needs three things that all happen before tile:
- A wet-rated, low-voltage fixture. An LED strip or channel rated for a shower zone, run on low voltage, with the driver mounted outside the wet area — in the ceiling void or an adjacent closet where it can be reached if it ever fails.
- A channel in the framing. The cable route has to be cut in before the backer board, and sealed where it passes through the waterproofing membrane. Drilling through a finished shower wall later is not an option.
- A recess so you see light, not diodes. Tucking the strip under the front lip of the shelf, or behind a small return, washes the back of the niche instead of glaring at you. Warm white (2700–3000K) flatters stone-look tile; cool white makes grey tile look clinical.
The electrical connection is work for a licensed electrician, and in a bathroom it has to be on the correct protected circuit.
The bench
Worth doing if anyone in the house will ever want to sit, shave a leg, or age in that house. A built-in bench is framed and waterproofed with the rest of the shower. A floating bench keeps the floor open and is easier to clean under, but it needs blocking in the wall before the drywall goes on.
A bench must slope slightly forward — about 1/4" per foot — so water runs off instead of pooling. A flat bench is a slow leak with a seat on it.
Curb, drain and glass
A curbless entry is the current preference and the most demanding to build: the floor has to be recessed or built up, the slope has to start further back, and the waterproofing has to be continuous into the bathroom floor. A linear drain lets the whole floor slope one way, which is what makes large-format tile possible on a shower floor. And if you want frameless glass, the walls have to be plumb — tile is what makes them plumb or exposes that they are not.
Edges, trim and grout — where a tile job is judged
Anyone can set a tile in the middle of a wall. The job is judged at the edges: the outside corner of a shower wall, the top of a wainscot, the return into a window, the end of a backsplash. There are four ways to finish an edge, and they do not cost the same or age the same.
1. Mitred 45° edge
Both tiles are cut back at 45 degrees and meet at the corner, so the glazed faces wrap around and you never see the raw biscuit. Done well, the corner reads as solid stone with a single hairline joint.
- Looks: the cleanest option, and the only one with no visible trim.
- Needs: a skilled hand, a wet saw with a mitre capacity, and a tile thick enough to take the cut. Thin wall tile can blow out.
- Trade-off: the resulting edge is thin porcelain. On a corner people brush past with a laundry basket, a knock will chip it — and a chipped mitre shows the pale body underneath. Best on corners out of the traffic line.
- Time: the slowest edge to produce. Every corner tile is cut twice and dry-fitted.

2. Metal profile
An L-shaped or rounded metal trim set into the mortar so its leg sits under the tile and its face closes the edge. Square profiles read modern; rounded ones read softer and are kinder to shins.
- Looks: deliberate rather than invisible. In brushed brass, matte black or anodized aluminium it becomes part of the design instead of a concession.
- Needs: the right profile height for the tile thickness — a profile that stands proud of the tile is the classic giveaway of a rushed job.
- Trade-off: it is visible. Choose it on purpose, in a finish that matches the faucets and the shower glass hardware, and it looks designed.
- Durability: the toughest edge available. This is what we recommend on any corner that gets touched.
3. Bullnose or factory edge
A tile with one finished, rounded edge from the factory. It used to be the default. It is much rarer now, because through-body porcelain and large formats are rarely produced with a matching bullnose — so if it exists for the tile you have chosen, it has to be ordered with the main tile, not after.
4. Raw edge with caulk
The cut edge left exposed and a bead of silicone run down it. It is quick and it is cheap, and on any tile with a body colour different from the glaze it announces itself from across the room. We do not recommend it anywhere visible.
Grout: joint, type and colour
| Decision | Options | What to know |
|---|---|---|
| Joint width | 1/16" – 1/8" for rectified tile; 3/16" and up for non-rectified | Rectified tile is machine-cut to an exact size and allows a tight joint. A pressed tile varies slightly and needs a wider joint to absorb it — forcing a thin joint on the wrong tile is how you get a crooked line. |
| Sanded vs unsanded | Sanded for joints 1/8" and wider; unsanded for narrower | Sanded grout in a very thin joint will not pack properly. Unsanded in a wide joint shrinks and cracks. |
| Cementitious vs epoxy | Cement is standard; epoxy for shower floors and heavy-use areas | Epoxy does not stain and never needs sealing, but it sets fast and is unforgiving to install — it costs more in labour, not just in material. Cement grout is easier to work and must be sealed. |
| Colour | Match the tile, or contrast it | Matching grout makes the wall read as one surface and hides small alignment differences. Contrasting grout makes the pattern the feature — and puts every joint on display, so the setting has to be perfect. It is a design decision, not a leftover one. |
Silicone, not grout, at every change of plane
This is the single easiest way to judge tile work. Wherever two planes meet — an inside corner, floor to wall, tile to tub, tile to countertop — the joint must be flexible silicone, never grout. The two surfaces move at different rates; grout is rigid, so it cracks, and once it cracks water is behind your tile.
Colour-matched silicone is made for exactly this, and a good tiler will have it in the same colour as the grout. If you look into a shower corner and see cracked grout, that job was built wrong.
Sealing
Cementitious grout is porous and should be sealed once it has cured — typically a few days after grouting, not the same afternoon. Natural stone tile needs sealing too, often before grouting as well as after, or the grout will stain the stone. Porcelain itself needs nothing. Epoxy grout needs nothing.
Backsplash: small area, most decisions
A backsplash is 25 to 40 square feet, and it is the part of the kitchen people look at while they wait for the kettle. Format and pattern do more work here than price.
Format
| Format | Reads as | Notes |
|---|---|---|
| 3"x6" subway | Classic, safe | Still the default; the pattern and grout do the talking |
| 2.5"x10" or 3"x12" elongated | Current, slimmer | Fewer grout lines than subway, same familiarity |
| Zellige-look / handmade | Warm, textured | Deliberate irregularity; needs a tiler who understands it |
| Hex & picket | Detailed | Best in a contained run, not wall to wall |
| Full slab / large format | Seamless, calm | Almost no grout; the most demanding to cut around outlets |

Pattern
- Straight stack — grid, modern, unforgiving of a wall that is not square.
- 1/3 offset — the current default for subway; avoids the dated 1/2 brick look.
- Vertical stack — makes a low backsplash feel taller; good under a range hood.
- Herringbone — the most labour, the most impact. Best behind the range only.
Three things people regret
- Stopping under the upper cabinets. Running the tile to the ceiling behind the range or open shelving costs little more and looks intentional.
- Grout colour chosen last. Matching grout makes a wall read as one surface; contrasting grout makes the pattern the feature. It is a design decision, not a leftover one.
- Outlets. Horizontal outlets, or outlets in the underside of the cabinet, keep the tile field clean. That has to be decided before the electrician finishes.
If you are still choosing, our backsplash trends guide goes through the looks in more detail.
Condos and strata buildings
Tile rarely needs a City permit — but a condo almost always needs strata approval, and that is where tile jobs stall.
- Sound transmission. Most Vancouver strata bylaws set a minimum impact rating for hard-surface floors. Tile over a bare slab will usually fail it. An acoustic underlay, or an uncoupling membrane with an acoustic layer, is how tile passes — and it has to be in the documents you submit, not discovered afterwards. See our underlayment guide.
- Work hours and elevator booking. Demolition and delivery usually have to be scheduled and the elevator booked. A one-week tile job becomes three if the building allows deliveries two mornings a week.
- Waterproofing documentation. Some councils want proof the shower was waterproofed before it was tiled over.
Our strata renovation rules guide covers the paperwork, and the permits guide covers when the City is involved.
How long it takes
| Job | On site |
|---|---|
| Kitchen backsplash | 1–2 days |
| Bathroom floor only | 2–3 days |
| Full bathroom (floor + shower) | 5–8 days |
| Open-plan main floor | 4–7 days |
Working days, not calendar days, and they assume the substrate is what everyone expected. Waterproofing and self-levelling both need cure time — a crew that does not wait for either is saving a day at your expense.
Five questions that separate a real quote from a cheap one
- Has anyone measured the floor for flatness, and is levelling in the price or an extra?
- What waterproofing system is being used, and does it include the pan, the curb and the niche?
- Does the price include removal and disposal of the existing floor?
- What happens if the substrate is worse than expected?
- Who is responsible for the strata submission and the acoustic rating?
A quote that answers all five is usually higher, and almost always cheaper by the end.
Getting a real number
Tile pricing depends on what is under the tile, so the only honest number comes after someone has looked at the floor.
We have been doing this in Vancouver since 1999, our installation work is covered by a one-year guarantee, and the estimate is free with no obligation. Send us the room size and a photo — or the name of a tile you have seen — and we will come back with a price for supply only, or supplied and installed.